Cavity wall insulation was once seen as a smart way to improve energy efficiency and lower heating costs. But when it becomes damaged, poorly installed, or affected by moisture, it can lead to damp, mould and long-term structural problems.
This guide gives homeowners a clear and practical overview of how to prepare for safe and professional cavity wall insulation removal. From identifying warning signs to understanding the removal process, it outlines the key steps needed to protect your home and get it ready for future improvements.
Getting Your Home Ready for Cavity Wall Insulation Removal
Removing damaged or ineffective cavity wall insulation is essential for maintaining the structural integrity and energy efficiency of your home. Whether caused by poor installation, water ingress or ageing materials, compromised insulation can lead to persistent damp, mould and higher energy bills. This guide outlines the key steps for preparing your home for a safe and professional removal process.
When Removal Makes Sense
Over time, cavity wall insulation can degrade or become waterlogged, leading to serious issues. Signs that removal may be necessary include damp patches on internal walls, musty smells, visible mould or an unexplained rise in heating costs. In some cases, insulation failure can also contribute to structural damage within the wall cavity.
Getting the Work Area Ready
To help the removal process go smoothly, clear the space around the affected walls. Move furniture, wall decorations and plants away from the area. Use dust sheets or protective coverings to safeguard floors and remaining surfaces from debris.
Ensure there is easy access for removal equipment such as vacuum units and air compressors. A tidy, well-organised space helps the team work efficiently and minimises disruption.
Clear External and Internal Access Points
Removal typically involves accessing your wall cavity via small holes drilled in the external brickwork. Make it easier for technicians by:
- Moving garden furniture, bins, or planters away from exterior walls
- Ensuring ladders can be safely positioned around the house
- Providing clear access inside your home to inspect for internal issues, especially in affected rooms
This not only speeds up the job but also ensures a safer working environment for the team.
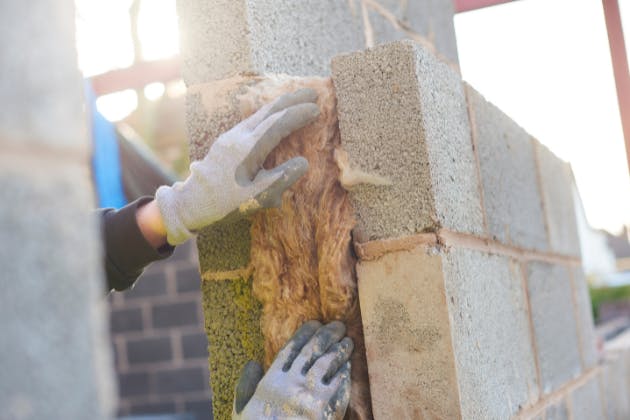
Identifying the Insulation Type
Knowing what material was originally installed can help plan for a safer removal. Common types include:
- Fibreglass: Can irritate skin and lungs.
- Cellulose: May retain moisture and support mould growth.
- Foam: May require chemical softening or special handling.
Each type presents different removal challenges, so professional assessment is recommended.
Why You Should Hire a Professional
Cavity wall insulation removal is not a simple DIY task. It involves drilling into external walls, handling specialist machinery and managing health risks. Experienced professionals use industrial-grade vacuums, compressors and trained methods to extract material safely without damaging the structure.
Overview of the Removal Process
The process usually involves the following:
- Small holes (22 to 25mm) are drilled in the outer wall at regular intervals
- Compressed air loosens the insulation inside the cavity
- A high-powered vacuum extracts insulation and debris through the drilled points
This method ensures a thorough clean without compromising the wall’s integrity.
What to Do After Removal
After removal, cavities should be inspected and cleaned thoroughly to ensure no debris or contaminants remain. Any signs of damage or damp should be repaired before considering new insulation.
This stage is crucial for ensuring the long-term success of any future insulation work and protecting your home from further problems.
FAQs
Ready to Get a Quote or Need Expert Advice in Bristol, Swansea, Cardiff or South Wales?
If you're concerned about your cavity wall insulation or want to explore your options for safe removal, our team is here to help. Call us today on 01639 790426 for expert advice and reliable service.
